
Linux系统安装Python3环境(超详细)

本文基于如下Linux系统版本:


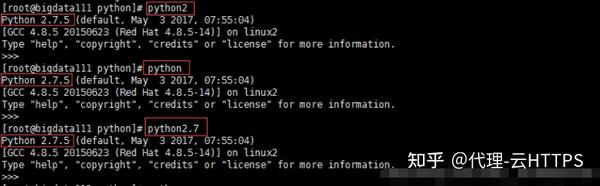
1、默认情况下,Linux会自带安装Python,可以运行python --version命令查看,如图:


我们看到Linux中已经自带了Python2.7.5。再次运行python命令后就可以使用python命令窗口了(Ctrl+D退出python命令窗口)。
2、查看Linux默认安装的Python位置
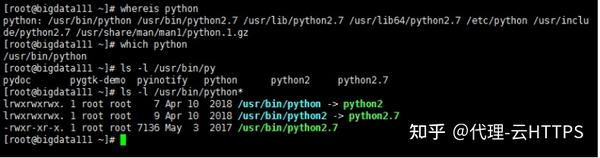

看到/usr/bin/python和/usr/bin/python2都是软链接,/usr/bin/python指向/usr/bin/python2,而/usr/bin/python2最终又指向/usr/bin/python2.7。所以运行python/python2/python2.7是一样的,
如图:

3、安装python3
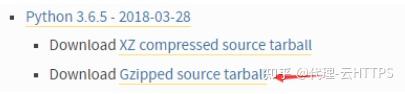
(1)登录https://www.python.org/downloads/source/,找到对应版本(我们以Python 3.6.5为例)
如图:
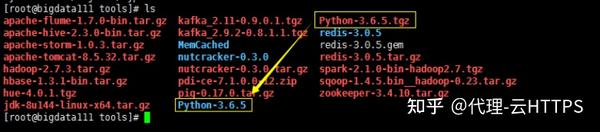
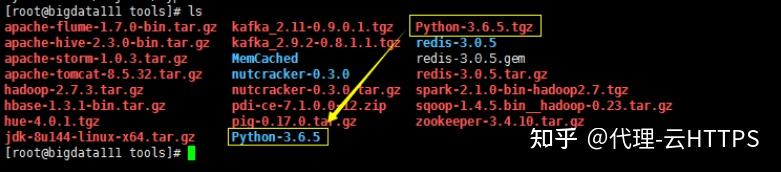
(2)文件上传
将文件上传到Linux系统的某个目录下,根据自己情况上传,本例上传到了/root/tools目录下,
如图:


(3)解压
执行tar -zxvf Python-3.6.5.tgz命令,将文件解压到当前目录,
如图:
(4)准备编译环境
执行如下命令:
yum -y install zlib-devel bzip2-devel openssl-devel ncurses-devel sqlite-devel readline-devel tk-devel gcc make安装python需要的依赖。成功后(Complete!),
如图:
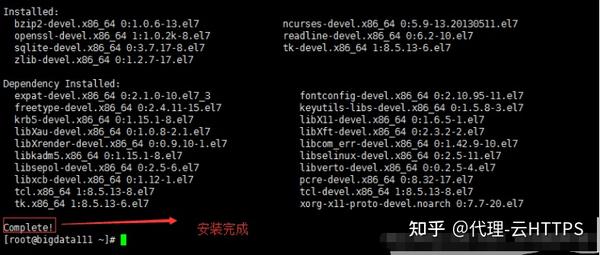

如果python是3.7版本,还需要安装libffi-devel。整个编译过程1分钟左右。
如果遇到如下问题:
Loaded plugins: fastestmirror
00:00:00
Could not retrieve mirrorlist http://mirrorlist.centos.org/?release=7&arch=x86_64&repo=os&infra=stock error was
14: curl#6 - "Could not resolve host: mirrorlist.centos.org; Unknown error"
One of the configured repositories failed (Unknown),
and yum doesn't have enough cached data to continue. At this point the only
safe thing yum can do is fail. There are a few ways to work "fix" this:
1. Contact the upstream for the repository and get them to fix the problem.
2. Reconfigure the baseurl/etc. for the repository, to point to a working
upstream. This is most often useful if you are using a newer
distribution release than is supported by the repository (and the
packages for the previous distribution release still work).
一般是不能连接外网,每个情况不一样,我的解决方案,执行如下命令
vi /etc/sysconfig/network-scripts/ifcfg-ens33
每个人的Linux中ifcfg-ens33名称不一定完全一样。我的配置如下:
TYPE=Ethernet
PROXY_METHOD=none
BROWSER_ONLY=no
#BOOTPROTO=none
DEFROUTE=yes
IPV4_FAILURE_FATAL=no
IPV6INIT=yes
IPV6_AUTOCONF=yes
IPV6_DEFROUTE=yes
IPV6_FAILURE_FATAL=no
IPV6_ADDR_GEN_MODE=stable-privacy
NAME=ens33
UUID=296fb7a9-961a-46ea-bc1b-678cca49d40a
DEVICE=ens33
ONBOOT=yes
IPADDR=192.168.189.111
GATEWAY=192.168.189.2
NETMASK=255.255.255.0
DNS1=8.8.8.8
PREFIX=24
IPV6_PRIVACY=no
配置好保存,执行service network restart重启网络服务。然后再重新执行上面的yum安装命令即可。
(5)编译安装
执行cd Python-3.6.5进入解压后的Python-3.6.5目录下,依次执行如下三个命令:
./configure --prefix=/root/training/Python-3.6.5
make
make install
其中--prefix是Python的安装目录,安装成功后,如图:

我们看到,同时安装了setuptools和pip工具。进入到/root/training/Python-3.6.5安装目录,
如图:


6)创建软链接
还记得开始,Linux已经安装了python2.7.5,这里我们不能将它删除,如果删除,系统可能会出现问题。我们只需要按照与Python2.7.5相同的方式为Python3.6.5创建一个软链接即可,我们把软链接放到/usr/local/bin目录下,
如图:


此时,我们在命令窗口运行python3,如图:


安装成功!当然此时还是可以使用Python2.7.5版本(运行python/python2/python2.7即可)。
(7)配置环境变量
配置环境变量主要是能快速使用pip3安装命令。
执行 vi ~/.bash_profile,打开配置文件,添加如下配置:
#配置python
export PYTHON_HOME=/root/training/Python-3.6.5
export PATH=$PYTHON_HOME/bin:$PATH
保存退出(:wq),执行source ~/.bash_profile命令使配置生效。执行echo命令,查看是否配置成功,
如图:.


❤❤❤❤❤❤❤❤❤❤❤❤❤❤❤❤❤
福利:注册送1万IP
支持HTTPS、SocKs5、
注册链接:
PC端:代理云 - 可视化用户控制台