


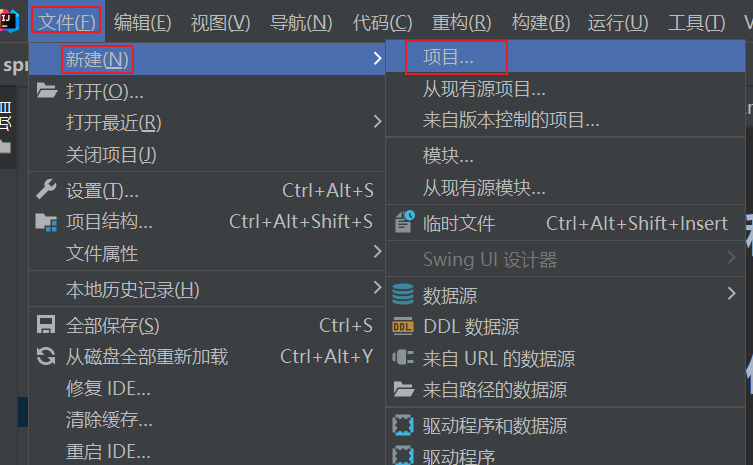
第一步:
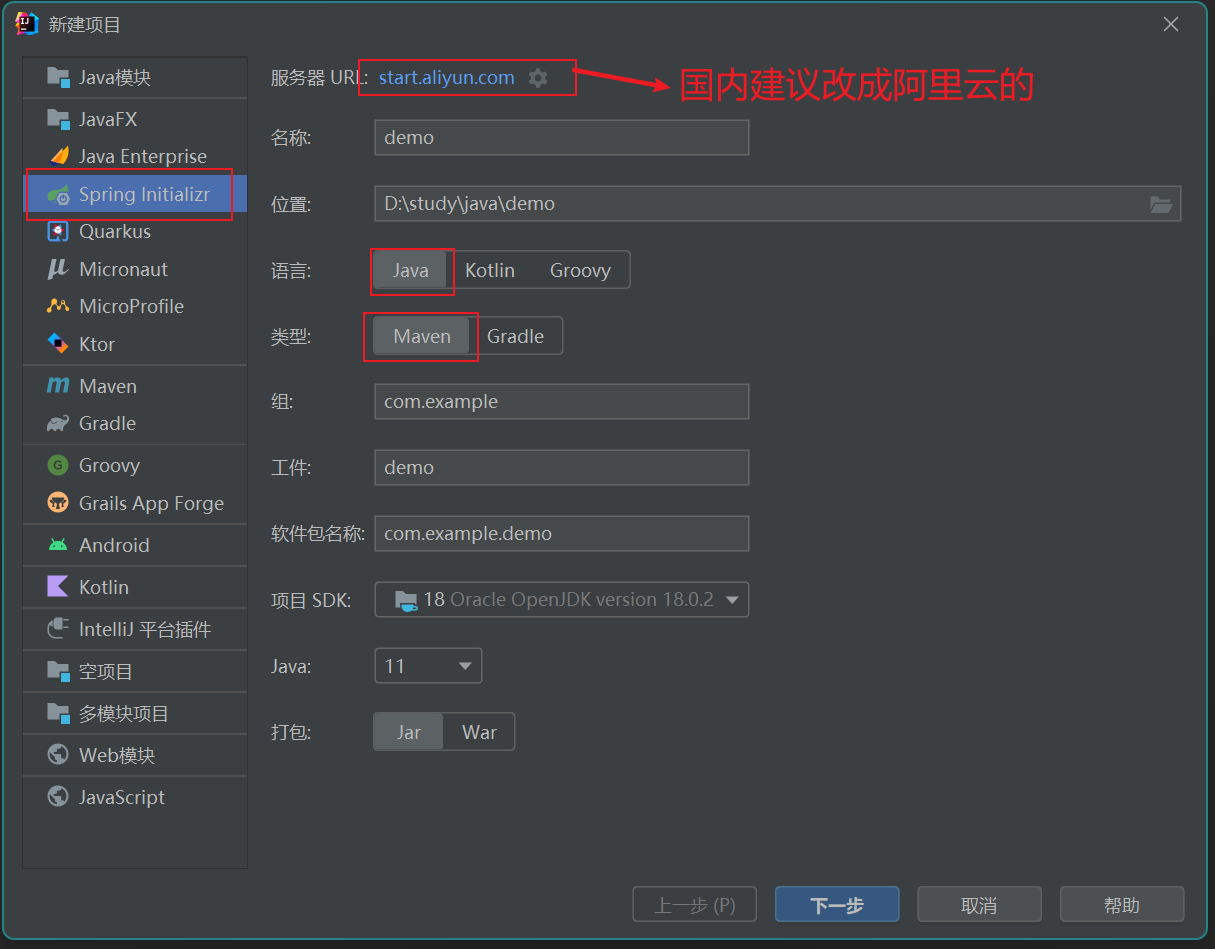
第二步:
https://start.aliyun.com/
第三步:根据需求选择依赖

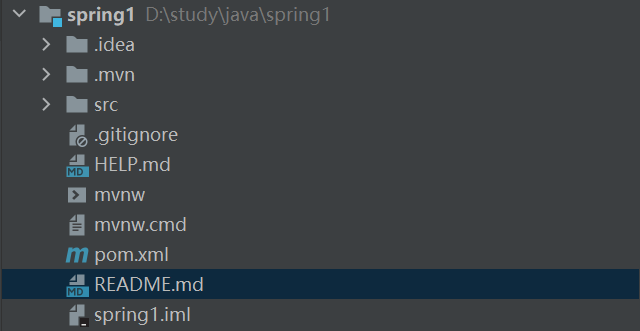
第四步:完成后项目结构如下:
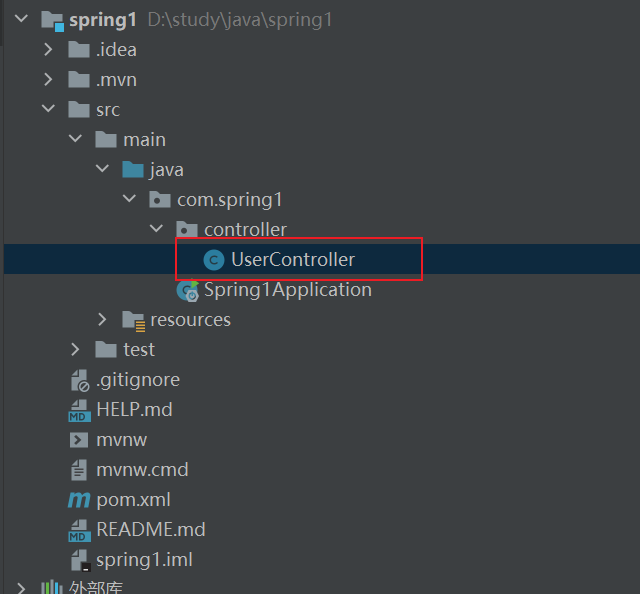
第五步:简单使用
创建文件UserController:
代码如下:
package com.spring1.controller;

import org.springframework.web.bind.annotation.GetMapping;
import org.springframework.web.bind.annotation.RequestMapping;
import org.springframework.web.bind.annotation.RestController;

@RestController
@RequestMapping("/users")
public class UserController {
    @GetMapping
    public String getByid(){
        System.out.println("springboot is running!!!");
        return "springboot is running!!!";
    }
}
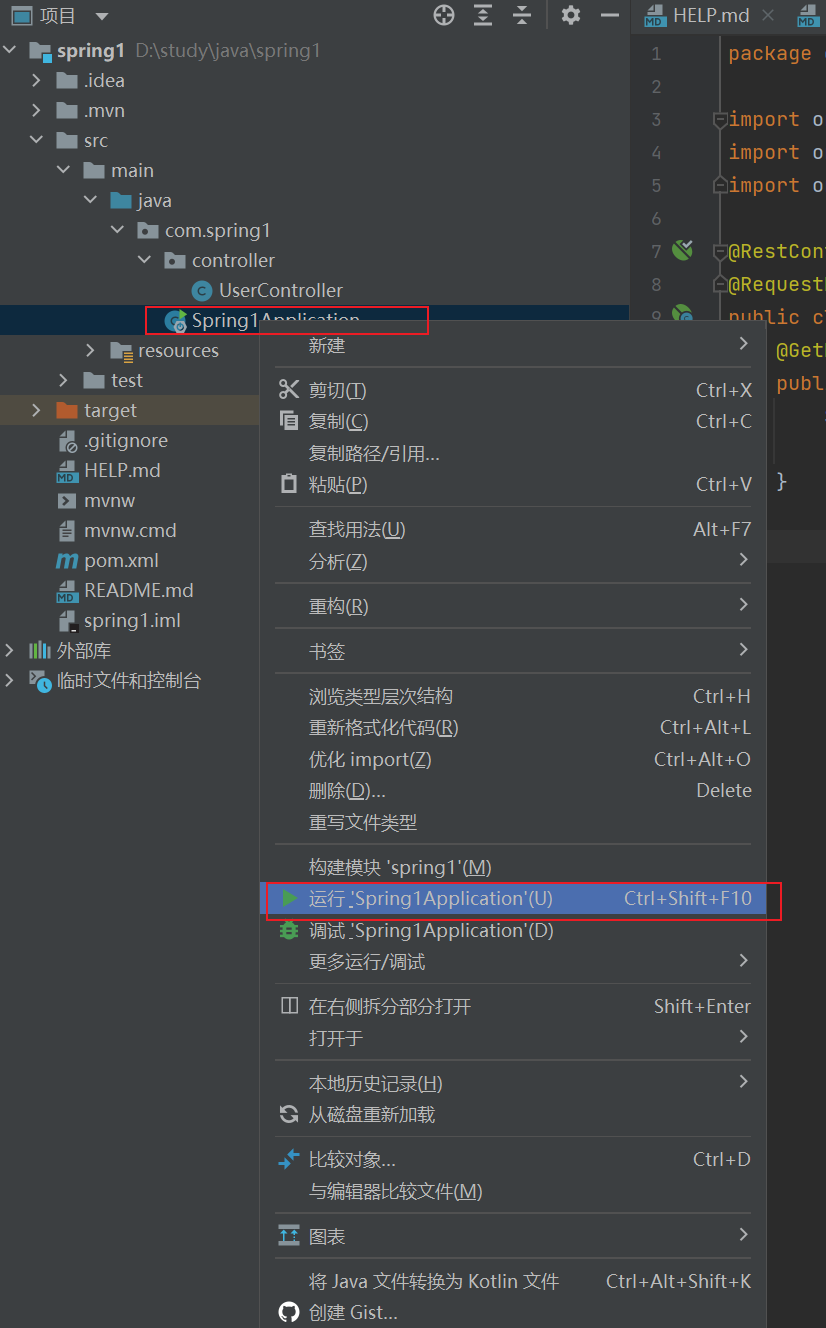
第六步,运行
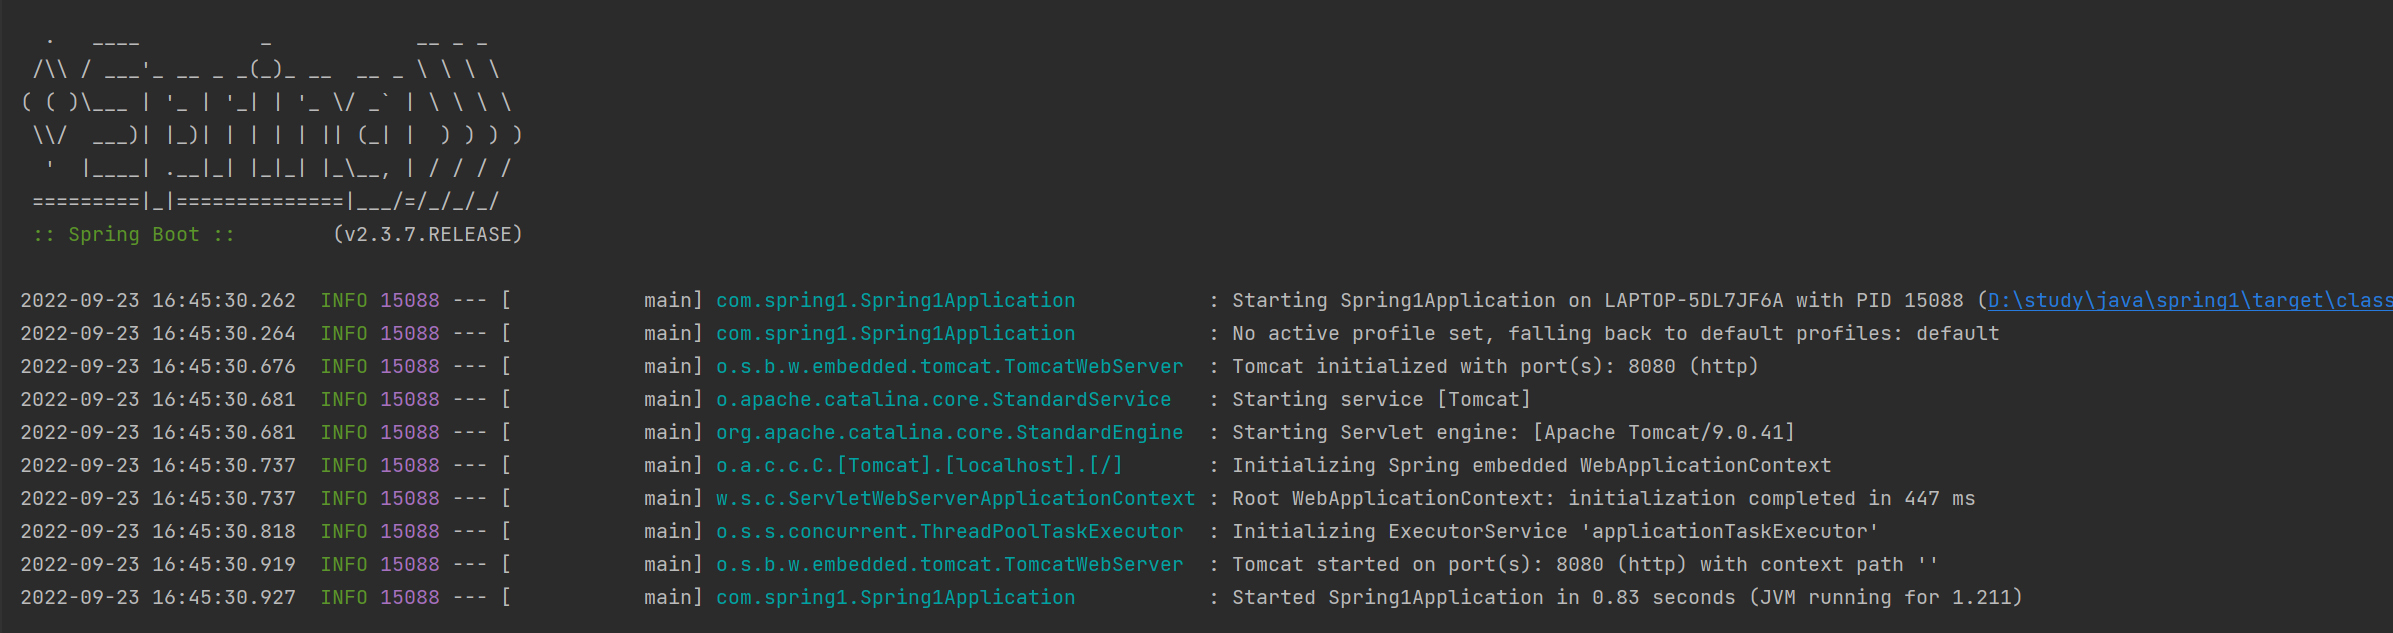
运行结果:
访问网址:http://localhost:8080/users

整体流程就是这样的


 773
773


 被折叠的 条评论
为什么被折叠?
被折叠的 条评论
为什么被折叠?
 到【灌水乐园】发言


