


转自:https://www.cnblogs.com/lmei/p/7190755.html?utm_source=itdadao&utm_medium=referral
@_@ 写在最前
之前分享过下面这几篇:
这一篇,在这些练习的基础上,将它们整合在一起!
搭建步骤如下
一、新建maven项目,配置环境,测试是否配置成功
二、整合spring+mybatis,添加ApplicationContext.xml文件,修改pom.xml,,并连接mysql,测试是否搭建成功
三、整合springmvc,添加springmvc-servlet.xml文件,修改调整,测试是否搭建成功
附:第一,二步详细操作步骤可参考
当然下面也会附上详细的搭建过程!
项目结构一览
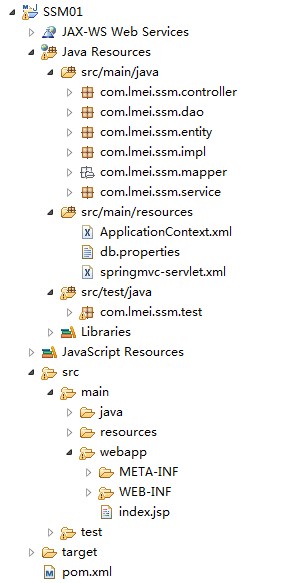
现在开始体验!!!
一、新建maven项目
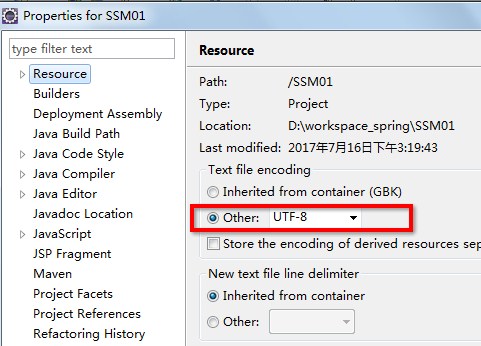
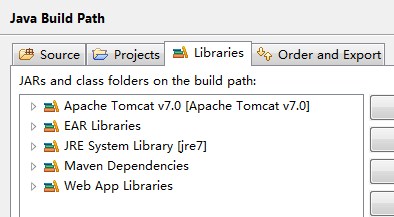
1、新建项目,然后修改几个配置,修改完如下:
2、添加Dynamic Web Module
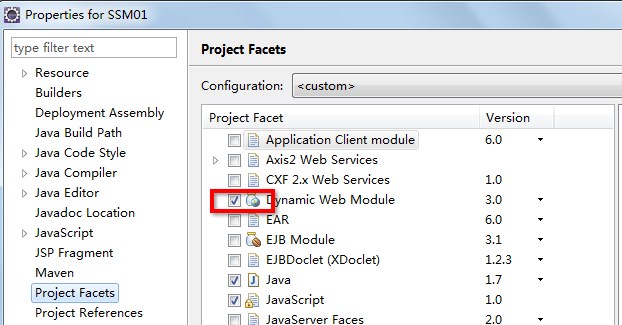
Apply后,查看项目结构可以看到多了个WebContent

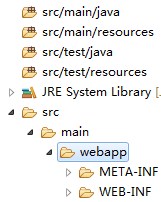
3、将WebContent下的两个文件复制到src/main/webapp下,然后将WebContent整个删掉
4、修改Deployment Assembly,只留下下面几个
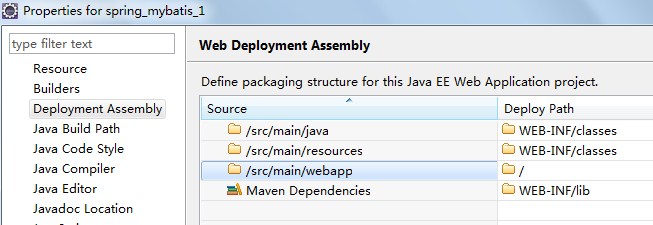
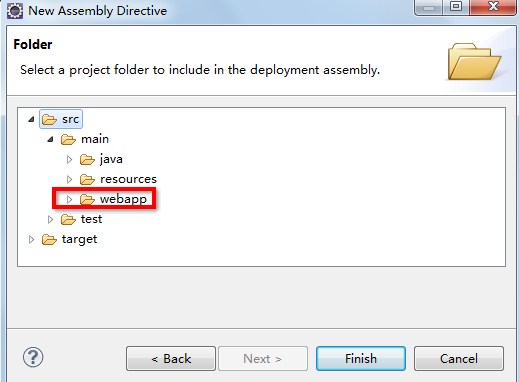
新增/src/main/webapp,步骤Add->Floder->src->main->webapp->finish
5、测试,在src/main/webapp下,新建一个index.jsp文件

pageEncoding="UTF-8"%>
Insert title here
修改web.xml
xmlns="http://java.sun.com/xml/ns/javaee"
xsi:schemaLocation="http://java.sun.com/xml/ns/javaee http://java.sun.com/xml/ns/javaee/web-app_3_0.xsd"
id="WebApp_ID" version="3.0">
index.jsp
运行tomcat,访问:http://localhost:8888/SSM01/,页面显示“hello”
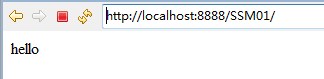
到此,第一步骤完成!!!
二、整合Spring+MyBatis
1、修改pom.xml,加载项目需要的jar

xsi:schemaLocation="http://maven.apache.org/POM/4.0.0 http://maven.apache.org/xsd/maven-4.0.0.xsd">
4.0.0
com.lmei.ssm
SSM01
0.0.1-SNAPSHOT
war
UTF-8
4.3.0.RELEASE
mysql
mysql-connector-java
5.1.38
org.apache.logging.log4j
log4j-core
2.6.1
org.mybatis
mybatis
3.4.1
junit
junit
4.10
org.springframework
spring-core
4.1.4.RELEASE
org.springframework
spring-context
4.1.4.RELEASE
org.springframework
spring-tx
4.1.4.RELEASE
org.springframework
spring-jdbc
4.1.4.RELEASE
org.springframework
spring-test
4.1.4.RELEASE
org.springframework
spring-web
4.1.4.RELEASE
org.springframework
spring-webmvc
4.1.4.RELEASE
org.aspectj
aspectjweaver
1.8.5
org.mybatis
mybatis-spring
1.3.0
javax.servlet
jstl
1.2
com.fasterxml.jackson.core
jackson-core
2.5.2
com.fasterxml.jackson.core
jackson-databind
2.5.2
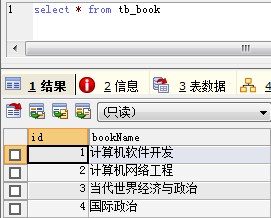
2、数据库准备
新建数据表tb_book,添加测试数据
3、新建包和类
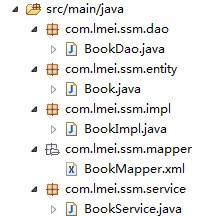
(1)添加实体类Book
package com.lmei.ssm.entity;
public class Book {
private int id;
private String bookName;
public int getId() {
return id;
}
public void setId(int id) {
this.id = id;
}
public String getBookName() {
return bookName;
}
public void setBookName(String bookName) {
this.bookName = bookName;
}
@Override
public String toString() {
return this.getId()+"\t"+this.getBookName();
}
}
(2)添加Dao,BookDao
package com.lmei.ssm.dao;
import java.util.List;
import com.lmei.ssm.entity.Book;
public interface BookDao {
public List getAllBook();
}
(3)添加service,BookService
package com.lmei.ssm.service;
import java.util.List;
import com.lmei.ssm.entity.Book;
public interface BookService {
public List getAllBook();
}
(4)添加impl,BookServiceImpl实现BookService
package com.lmei.ssm.impl;
import java.util.List;
import javax.annotation.Resource;
import org.springframework.stereotype.Service;
import com.lmei.ssm.dao.BookDao;
import com.lmei.ssm.entity.Book;
import com.lmei.ssm.service.BookService;
@Service
public class BookServiceImpl implements BookService{
@Resource
BookDao bookDao;
public List getAllBook() {
return bookDao.getAllBook();
}
}
(5)添加BookMapper
select * from tb_book
4、添加ApplicationContext.xm和db.propertiesl文件,并注册映射
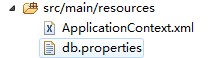
ApplicationContext.xml
xmlns:xsi="http://www.w3.org/2001/XMLSchema-instance" xmlns:p="http://www.springframework.org/schema/p"
xmlns:aop="http://www.springframework.org/schema/aop" xmlns:context="http://www.springframework.org/schema/context"
xsi:schemaLocation="http://www.springframework.org/schema/beans
http://www.springframework.org/schema/beans/spring-beans.xsd
http://www.springframework.org/schema/context
http://www.springframework.org/schema/context/spring-context-4.3.xsd
http://www.springframework.org/schema/aop
http://www.springframework.org/schema/aop/spring-aop-4.3.xsd">
class="org.springframework.jdbc.datasource.DriverManagerDataSource">
value="classpath:com/lmei/ssm/mapper/*Mapper.xml">
db.properties
jdbc.driver=com.mysql.jdbc.Driver
jdbc.url=jdbc:mysql://localhost:3306/test?useUnicode=true&characterEncoding=UTF-8&zeroDateTimeBehavior=convertToNull
jdbc.username=root
jdbc.password=123456
5、添加测试类
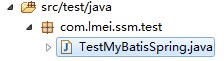
TestMyBatisSpring
package com.lmei.ssm.test;
import static org.junit.Assert.assertNotNull;
import java.util.List;
import org.junit.Test;
import org.springframework.context.ApplicationContext;
import org.springframework.context.support.ClassPathXmlApplicationContext;
import com.lmei.ssm.dao.BookDao;
import com.lmei.ssm.entity.Book;
public class TestMyBatisSpring {
@Test
public void test() {
//初始化容器
ApplicationContext ctx=new ClassPathXmlApplicationContext("ApplicationContext.xml");
//获得bean
BookDao bookDao = ctx.getBean(BookDao.class);
//访问数据库
List books = bookDao.getAllBook();
for (Book book : books) {
System.out.println(book.getBookName());
}
assertNotNull(books);
}
}
Run As->JUnit Test
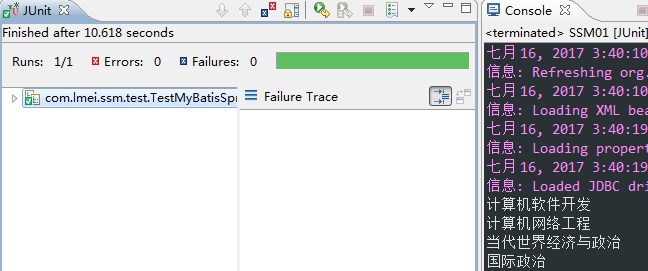
到此,第二步完成Spring+MyBatis+Mysql!!!
三、整合springmvc
1、修改实体类Book
package com.lmei.ssm.entity;
import java.io.Serializable;
public class Book implements Serializable {
private static final long serialVersionUID = 1L;
private int id;
private String bookName;
public int getId() {
return id;
}
public void setId(int id) {
this.id = id;
}
public String getBookName() {
return bookName;
}
public void setBookName(String bookName) {
this.bookName = bookName;
}
@Override
public String toString() {
return "id:" + getId() + ",bookName:" + getBookName() ;
}
}
2、在WEB-INF下新建一个文件夹view,然后在里面新建hello.jsp文件,用来测试springmvc是否搭建成功
路径webapp/WEB-INF/view/hello.jsp
pageEncoding="UTF-8"%>
--%>
Insert title here${message}
3、新建一个controller,HelloWorld.java

HelloWorld.java代码:
package com.lmei.ssm.controller;
import org.springframework.stereotype.Controller;
import org.springframework.ui.Model;
import org.springframework.web.bind.annotation.RequestMapping;
//@Controller是为了让Spring IOC容器初始化时自动扫描到;
//@RequestMapping是为了映射请求路径
@Controller
@RequestMapping("/Hello")
public class HelloWorld {
@RequestMapping("/SayHello")
public String SayHello(Model model) {
model.addAttribute("message", "Hello Spring MVC!");
System.out.println(model.containsAttribute("message")); //是否成功赋值
return "hello";
}
}
4、添加springmvc-servlet.xml
xmlns:xsi="http://www.w3.org/2001/XMLSchema-instance"
xmlns:context="http://www.springframework.org/schema/context"
xmlns:mvc="http://www.springframework.org/schema/mvc"
xsi:schemaLocation="http://www.springframework.org/schema/beans
http://www.springframework.org/schema/beans/spring-beans.xsd
http://www.springframework.org/schema/context
http://www.springframework.org/schema/context/spring-context-4.3.xsd
http://www.springframework.org/schema/mvc
http://www.springframework.org/schema/mvc/spring-mvc-4.3.xsd">
class="org.springframework.web.servlet.view.InternalResourceViewResolver"
id="internalResourceViewResolver">
5、修改web.xml
xmlns="http://java.sun.com/xml/ns/javaee"
xsi:schemaLocation="http://java.sun.com/xml/ns/javaee http://java.sun.com/xml/ns/javaee/web-app_3_0.xsd"
id="WebApp_ID" version="3.0">
index.jsp
org.springframework.web.context.ContextLoaderListener
contextConfigLocation
classpath*:ApplicationContext.xml
springmvc
org.springframework.web.servlet.DispatcherServlet
contextConfigLocation
classpath*:springmvc-servlet.xml
1
springmvc
/
characterEncodingFilter
org.springframework.web.filter.CharacterEncodingFilter
encoding
UTF-8
forceEncoding
true
characterEncodingFilter
/*
之前在测试过程中,不小心把/ 写错成 /*,导致springmvc把*.jsp,*.sql,*.txt都当做txt处理,访问页面时,直接在浏览器加载了jsp源码。
导致测试页面hello.jsp中的${message}一直取不到Controller传过来的值。
springmvc
/
6、测试,项目右键->Run As->Run On Server->Tomcat...
运行成功后,访问:http://localhost:8888/SSM01/Hello/SayHello
控制台输出:输出true,表示${message}赋值成功

浏览器输出:
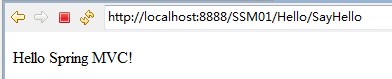
到此,SpringMVC搭建成功 !!!
继续整合!!!
7、在controller包下,新建一个BookController
package com.lmei.ssm.controller;
import java.util.List;
import javax.annotation.Resource;
import org.springframework.stereotype.Controller;
import org.springframework.ui.Model;
import org.springframework.web.bind.annotation.RequestMapping;
import com.lmei.ssm.entity.Book;
import com.lmei.ssm.service.BookService;
@Controller
@RequestMapping("/Book")
public class BookController {
@Resource
BookService bookService;
@RequestMapping("/getAllBook")
public String getAllBook(Model model) {
List books = bookService.getAllBook();
for (Book book : books) {
System.out.println(book.getBookName());
}
model.addAttribute("books", books);
return "Book/index";
}
}
8、在WEB-INFO/view下新建一个文件夹Book,然后在文件夹内添加index.jsp
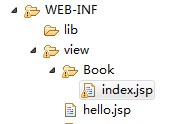
Book/index.jsp代码:
图书管理
| 编号 | 书名 |
|---|---|
| ${book.id} | ${book.bookName} |
9、测试
运行服务器,在浏览器访问:http://localhost:8888/SSM01/Book/getAllBook
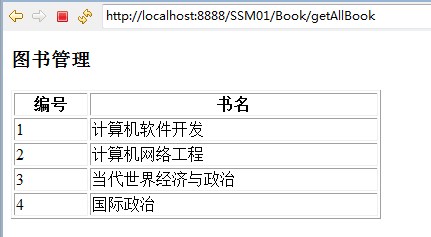
到此,完成SpringMVC+Spring+MyBatis的整合!!!


 132
132


 被折叠的 条评论
为什么被折叠?
被折叠的 条评论
为什么被折叠?
 到【灌水乐园】发言


