


Spring Security SSO 授权认证(OAuth2)
手机用户请
横屏获取最佳阅读体验,REFERENCES中是本文参考的链接,如需要链接和更多资源,可以关注其他博客发布地址。
| 平台 | 地址 |
|---|---|
| CSDN | https://blog.csdn.net/sinat_28690417 |
| 简书 | https://www.jianshu.com/u/3032cc862300 |
| 个人博客 | https://yiyuery.github.io/NoteBooks/ |
简介
我们将讨论如何使用Spring Security OAuth2和Spring Boot实现SSO - 单点授权认证。
我们将使用三个单独的应用程序:
- 授权服务器 - 这是中央身份验证机制
- 两个客户端应用程序:使用SSO的应用程序
非常简单地说,当用户试图访问客户端应用程序中的安全页面时,他们将被重定向到首先通过身份验证服务器进行身份验证。
我们将使用OAuth2中的授权代码授权类型来驱动身份验证委派。
项目搭建
权限认证服务器
Maven依赖
<dependency>
    <groupId>org.springframework.boot</groupId>
    <artifactId>spring-boot-starter-web</artifactId>
</dependency>
<dependency>
    <groupId>org.springframework.security.oauth</groupId>
    <artifactId>spring-security-oauth2</artifactId>
</dependency>
<dependency>
     <groupId>org.springframework.boot</groupId>
     <artifactId>spring-boot-starter-thymeleaf</artifactId>
</dependency>
OAuth配置
重要的是要理解我们将在这里一起运行授权服务器和资源服务器,都可以作为单个部署单元。
让我们从资源服务器的配置开始 - 它也是我们的主要Boot应用程序:
@SpringBootApplication
@EnableResourceServer
public class AuthorizationServerApplication extends SpringBootServletInitializer {
    public static void main(String[] args) {
        SpringApplication.run(AuthorizationServerApplication.class, args);
    }
}
然后,我们将配置我们的授权服务器:
@Configuration
@EnableAuthorizationServer
public class AuthServerConfig extends AuthorizationServerConfigurerAdapter {

    @Autowired
    private BCryptPasswordEncoder passwordEncoder;

    @Override
    public void configure(
      AuthorizationServerSecurityConfigurer oauthServer) throws Exception {
        oauthServer.tokenKeyAccess("permitAll()")
          .checkTokenAccess("isAuthenticated()");
    }

    @Override
    public void configure(ClientDetailsServiceConfigurer clients) throws Exception {
        clients.inMemory()
          .withClient("SampleClientId")
          .secret(passwordEncoder.encode("secret"))
          .authorizedGrantTypes("authorization_code")
          .scopes("user_info")
          .autoApprove(true)
          .redirectUris("http://localhost:8082/ui/login","http://localhost:8083/ui2/login");
    }
}
请注意我们如何仅使用authorization_code grant类型启用简单客户端。
另外,请注意autoApprove如何设置为true,以便我们不会被重定向,并提升为手动批准任何范围。
安全配置
首先,我们将通过application.properties禁用默认的基本身份验证:
server.port=8081
server.servlet.context-path=/auth
现在,让我们转到配置并定义一个简单的表单登录机制:
@Configuration
@Order(1)
public class SecurityConfig extends WebSecurityConfigurerAdapter {

    @Override
    protected void configure(HttpSecurity http) throws Exception {

        http.csrf().disable().authorizeRequests().antMatchers("/login", "/oauth/authorize","/","/index").permitAll()
                .and().authorizeRequests().anyRequest().authenticated()
                .and().formLogin().defaultSuccessUrl("/hello").permitAll()
                .and().logout().logoutSuccessUrl("/login").permitAll()
                .and()
                .requestMatchers().antMatchers("/login", "/oauth/authorize","/hello")
                .and().authorizeRequests().anyRequest().authenticated();
    }

    @Override
    protected void configure(AuthenticationManagerBuilder auth) throws Exception {
        auth.inMemoryAuthentication()
                .withUser("john")
                .password(passwordEncoder().encode("123"))
                .roles("USER");
    }

    @Override
    public void configure(WebSecurity web) throws Exception {
        web.ignoring().mvcMatchers("/index", "/");
    }

    @Bean
    public BCryptPasswordEncoder passwordEncoder() {
        return new BCryptPasswordEncoder();
    }
}
请注意,我们使用简单的内存中身份验证,但我们可以简单地将其替换为自定义userDetailsService。
用户端点
最后,我们将创建我们之前在配置中使用的用户端点:
@RestController
public class UserController {
    @GetMapping("/user/me")
    public Principal user(Principal principal) {
        return principal;
    }
}
当然,这将使用JSON表示返回用户数据。
测试认证部分
http://localhost:8081/auth/oauth/authorize?response_type=code&client_id=SampleClientId&redirect_uri=http://localhost:8082/ui/login&scope=user_info
界面跳转到登陆界面,登陆完成后,返回授权code

备注:此处尚未定义客户端
ui的应用程序,所以可以看到授权码信息
客户端应用程序
接下来准备配置对应的客户端程序:
maven依赖
<dependency>
    <groupId>org.springframework.boot</groupId>
    <artifactId>spring-boot-starter-web</artifactId>
</dependency>
<dependency>
    <groupId>org.springframework.boot</groupId>
    <artifactId>spring-boot-starter-security</artifactId>
</dependency>
<dependency>
    <groupId>org.springframework.security.oauth.boot</groupId>
    <artifactId>spring-security-oauth2-autoconfigure</artifactId>
    <version>2.0.1.RELEASE</version>
</dependency>
<dependency>
    <groupId>org.springframework.boot</groupId>
    <artifactId>spring-boot-starter-thymeleaf</artifactId>
</dependency>
<dependency>
    <groupId>org.thymeleaf.extras</groupId>
    <artifactId>thymeleaf-extras-springsecurity4</artifactId>
</dependency>
安全配置
@EnableOAuth2Sso
@Configuration
public class UiSecurityConfig extends WebSecurityConfigurerAdapter {


    @Override
    public void configure(HttpSecurity http) throws Exception {
        /**
         * authenticated()要求在执行该请求时,
         * 必须已经登录了应用。如果用户没有认证的话,Spring Security的Filter将会捕获该请求,并将用户重定向到应用的登录页面。
         * 同时,permitAll()方法允许请求没有任何的安全限制。
         */
        http.antMatcher("/**")
            .authorizeRequests()
            .antMatchers("/", "/login**")
            .permitAll()
            .anyRequest()
            .authenticated();
    }

}
当然,这种配置的核心部分是我们用于启用单点登录的@ EnableOAuth2Sso注释。
请注意,我们需要扩展WebSecurityConfigurerAdapter - 如果没有它,所有路径都将受到保护 - 因此用户将在尝试访问任何页面时重定向以登录。在我们的例子中,索引和登录页面是唯一可以在没有身份验证的情况下访问的页面。
最后,我们还定义了一个RequestContextListener bean来处理请求范围。
@SpringBootApplication
public class SpringSecuritySsoUiApplication {

    @Bean
    public RequestContextListener requestContextListener() {
        return new RequestContextListener();
    }

    public static void main(String[] args) {
        SpringApplication.run(SpringSecuritySsoUiApplication.class, args);
    }

}
application.yml:
server:
    port: 8082
    servlet:
      context-path: /ui
    session:
      cookie:
        name: UISESSION
security:
  basic:
    enabled: false
  oauth2:
    client:
      clientId: SampleClientId
      clientSecret: secret
      accessTokenUri: http://localhost:8081/auth/oauth/token
      userAuthorizationUri: http://localhost:8081/auth/oauth/authorize
    resource:
      userInfoUri: http://localhost:8081/auth/user/me
spring:
  thymeleaf:
    cache: false
一些快速说明:
1)我们禁用了默认的基本身份验证
2)accessTokenUri是获取访问令牌的URI
3)userAuthorizationUri是用户将被重定向到的授权URI
4)userInfoUri用户端点的URI,用于获取当前用户详细信息
另请注意,在我们的示例中,我们定义了授权服务器,但当然我们也可以使用其他第三方提供商,如Facebook或GitHub。
前端
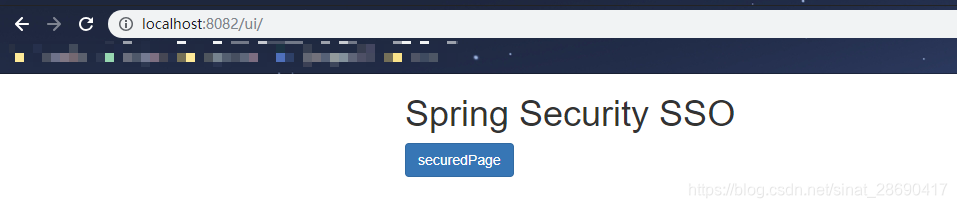
index.html
<!DOCTYPE html>
<html lang="en">
<head>
<meta http-equiv="Content-Type" content="text/html; charset=utf-8" />
<title>Spring Security SSO</title>
<link rel="stylesheet"
   href="https://maxcdn.bootstrapcdn.com/bootstrap/3.3.2/css/bootstrap.min.css" />
</head>

<body>
<div class="container">
   <div class="col-sm-12">
      <h1>Spring Security SSO</h1>
      <a class="btn btn-primary" href="securedPage">securedPage</a>
   </div>
</div>
</body>
</html>
securedPage.html
<!DOCTYPE html>
<html lang="en">
<head>
<meta http-equiv="Content-Type" content="text/html; charset=utf-8" />
<title>Spring Security SSO</title>
<link rel="stylesheet"
	href="https://maxcdn.bootstrapcdn.com/bootstrap/3.3.2/css/bootstrap.min.css" />
</head>

<body>
<div class="container">
	<div class="col-sm-12">
		<h1>Secured Page Client UI 1</h1>
		Welcome, <span th:text="${#authentication.name}">Name</span>
	</div>
</div>
</body>
</html>
登录模拟
- 访问客户端
/ui
- 跳转后进入登录界面
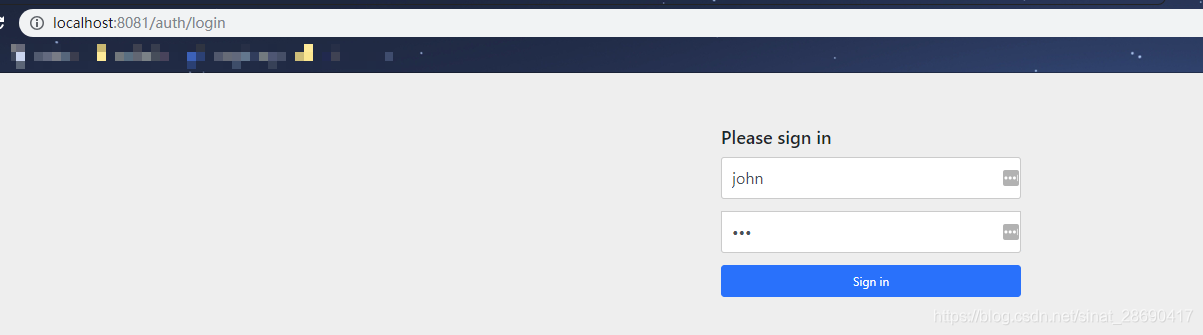
- 登录后回到授权界面

- 访问
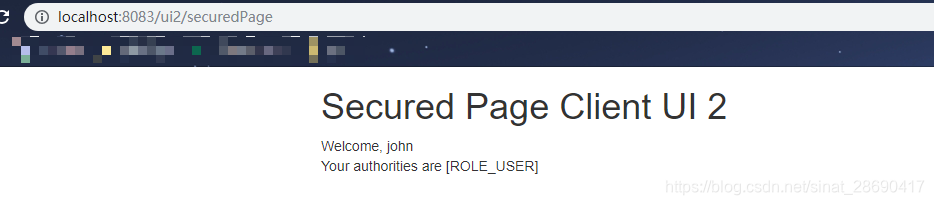
/ui2,并点击授权页面securedPage
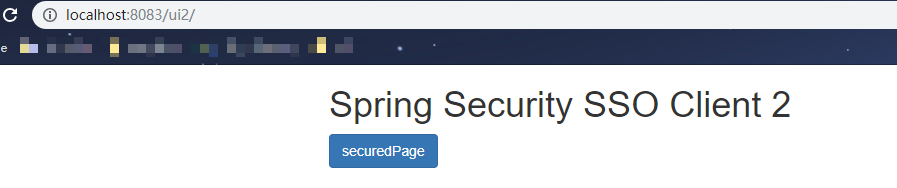
- 无需再次登录直接完成授权
REFRENCES
更多
扫码关注“架构探险之道”,获取更多源码和文章资源

知识星球(扫码加入获取源码和文章资源链接)


 1741
1741


 被折叠的 条评论
为什么被折叠?
被折叠的 条评论
为什么被折叠?
 到【灌水乐园】发言


