


ss5+proxychains
主要原理:利用proxychains在终端使用socks5代理
背景介绍:
由于公司内部上网权限管理比较严格,因此放置在公司内部的测试服务器只有少数可以上网。
而proxychains就可以非常简单快速的设置好代理,让其它不能上网的服务器通过能上网的服务器进行上网。
proxychains只需要在不能上网的机器上安装好,而能够上网的服务器,是不需要任何配置的,只要能SSH登陆就可以。
服务器环境:
可以上网:192.168.92.2
不能上网:192.168.92.138
本实验是简单配置,主要内容结合公司需求即可
上网服务器:
- 配置 Socks5 编译环境
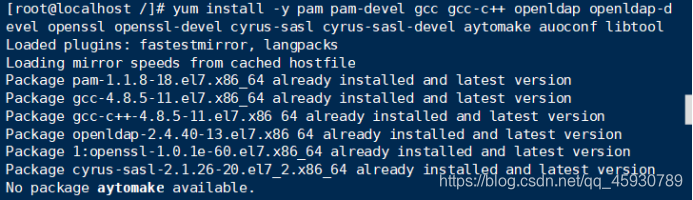
配置ss5依赖软件
[root@localhost /]# yum install -y pam pam-devel gcc gcc-c++ openldap openldap-devel openssl openssl-devel cyrus-sasl cyrus-sasl-devel aytomake auoconf libtool automake make
2.下载,编译安装 Socks5
到此下载 http://sourceforge.net/projects/ss5/files/
http://ss5.sourceforge.net/
官方实例
http://ss5.sourceforge.net/examples.htm
请安装 ss5-3.6.4-3.tar.gz 而不要安装新版,不然会有严重错误!
wget -c http://downloads.sourceforge.net … /ss5-3.6.4-3.tar.gz
解压,配置,编译安装
[root@localhost ~]# tar zxf ss5-3.8.9-8.tar.gz -C /usr/local/src/
[root@localhost ~]# cd /usr/local/src/
[root@localhost src]# ls
ss5-3.8.9
[root@localhost src]# cd ss5-3.8.9/
[root@localhost ss5-3.8.9]# ./configure
[root@localhost ss5-3.8.9]# make && make install
有些文件内容需要我们配置,修改
[root@localhost ss5-3.8.9]# vim /etc/opt/ss5/ss5.conf
auth 0.0.0.0/0 - - (87行)注释行去掉
permit - 0.0.0.0/0 - 0.0.0.0/0 - - - - - (203行)
[root@bogon yang]# vim /etc/opt/ss5/ss5.passwd
test test (添加)
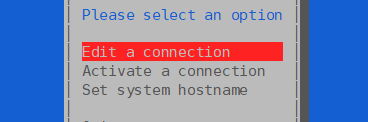
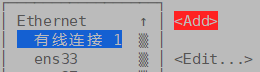
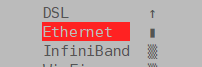
3.添加网卡(可以自行添加,也可以用本案例)(最终目的是能够与外网相连接,完成测试)
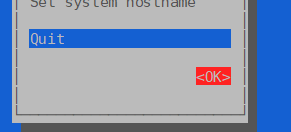
[root@localhost ss5-3.8.9]# nmtui nmtui(添加网卡的一种方式)
!


[root@localhost ss5-3.8.9]# cd /etc/sysconfig/network-scripts/
[root@localhost network-scripts]# ls
ifcfg-ens33 ifdown-ipv6 ifdown-tunnel ifup-isdn ifup-TeamPort
ifcfg-ens37 ifdown-isdn ifup ifup-plip ifup-tunnel
ifcfg-lo ifdown-post ifup-aliases ifup-plusb
[root@localhost network-scripts]# vim ifcfg-ens37
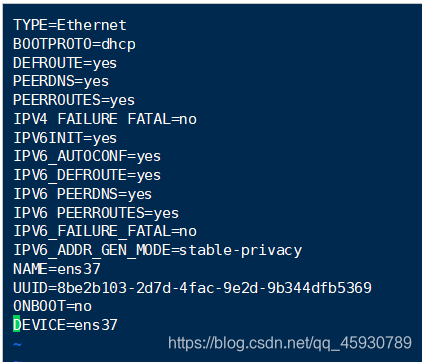
添加权限,开机自启,开启ss5服务
[root@localhost network-scripts]# chmod +x /etc/init.d/ss5
[root@localhost network-scripts]# chkconfig --add ss5
[root@localhost network-scripts]# service ss5 start
Starting ss5 (via systemctl): [ 确定 ]
重启网卡
[root@localhost network-scripts]# ifdown ens37 ; ifup ens37
Device ‘ens37’ successfully disconnected.
Connection successfully activated (D-Bus active path: /org/freedesktop/NetworkManager/ActiveConnection/6)
查看是ens37否分配地址(ifconfig)(前提是需要连接网络)
最后测试是否能连接到外网
[root@localhost network-scripts]# ping www.baidu.com
PING www.a.shifen.com (220.181.38.150) 56(84) bytes of data.
64 bytes from 220.181.38.150 (220.181.38.150): icmp_seq=1 ttl=51 time=42.4 ms
64 bytes from 220.181.38.150 (220.181.38.150): icmp_seq=2 ttl=51 time=81.7 ms
^C
不能上网服务器
配置步骤:
下载proxychains
[dong.guo@192.168.92.2 ~]$ git clone https://github.com/haad/proxychains
安装proxychains
[dong.guo@192.168.92.138 ~]$ tar xzf proxychains.tgz
[dong.guo@192.168.92.138 ~]$ cd proxychains
[dong.guo@192.168.92.138 proxychains]$ ./configure
[dong.guo@192.168.92.138 proxychains]$ make && make install
备份
[root@localhost ~]# cd proxychains-ng/
[root@localhost proxychains-ng]# cp ./src/proxychains.conf /etc/proxychains.conf
[root@localhost proxychains-ng]# cd
[root@localhost ~]# rm -rf proxychains-ng
编辑proxychains配置
[root@localhost ~]# vim /etc/proxychains.conf

(192.168.1.111 为上网服务器地址)
测试
[root@localhost ~]# proxychains4 curl www.baidu.com
[proxychains] config file found: /etc/proxychains.conf
[proxychains] preloading /usr/local/lib/libproxychains4.so
[proxychains] DLL init: proxychains-ng 4.14-git-8-gb8fa2a7
[proxychains] Strict chain … 192.168.1.111:1080 … www.baidu.com:80 … OK
测试成功即可
(注意:本实验为简化,具体根据公司需求配置)


 9206
9206


 被折叠的 条评论
为什么被折叠?
被折叠的 条评论
为什么被折叠?
 到【灌水乐园】发言


