How to enter the bios setting interface on Lenovo desktop

- PHPzforward
- 2023-07-14 12:53:1430356browse
Recently, many netizens have asked how to enter the bios of Lenovo desktop computer to set up USB boot. I just bought a desktop computer to install the computer system and found that the prepared USB boot cannot be found. Let’s talk to you about Lenovo. How to enter the computer bios interface.
1. First turn on the computer power. When the screen "Lenovo" appears on the computer screen, you will also see the following words "Press F2 to Setup" in the lower left corner. At this time, quickly press the "F2" key on the keyboard to enter the BIOS settings.

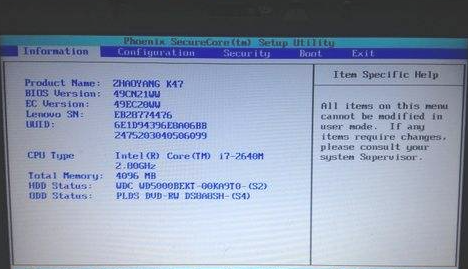
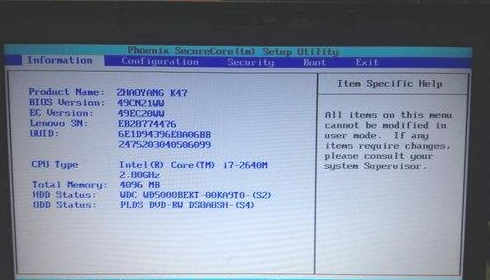
#2. Next, the computer will enter the hardware BIOS setting interface.
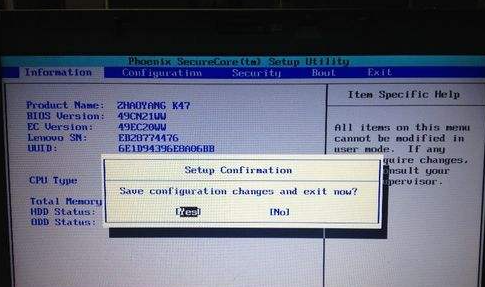
#3. After we complete the BIOS settings of the computer, we can press "F10" on the keyboard to save the current configuration and exit the BIOS program.
#4. Finally, select “YES” first and press the “Enter” key on the keyboard.
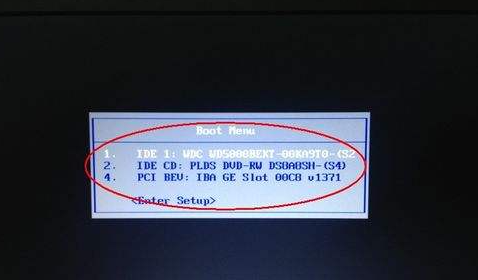
5. In addition, if we need to temporarily boot from other devices during startup, such as CDs, U disks, etc., we can , press the "F12" key to select the startup sequence.
The above is the method shared with you on how to open the bios setting interface on Lenovo computers. If you need to adjust something here, you can follow the above method to enter the bios. interface, I hope the above content can help everyone.
The above is the detailed content of How to enter the bios setting interface on Lenovo desktop. For more information, please follow other related articles on the PHP Chinese website!